To measure Your Desk Setup for Perfect Ergonomics: A Step-by-Step Guide, focus on proper ergonomics, consistent micro-breaks, and recovery habits tailored to your desk setup. Research shows these three pillars reduce discomfort by up to 60% in desk workers.
Your Desk Is Hurting You — And You Don’t Even Know It
You sit down to work. Within an hour, your neck aches. Your shoulders creep up toward your ears. Your lower back starts that familiar dull throb. You shift in your chair, adjust your monitor, maybe prop your laptop on a stack of books. Nothing helps — not really.
Here’s the uncomfortable truth: the problem isn’t you. It’s your setup.
Most desk workers guess their ergonomics. They set their chair to “feels okay” and their monitor to “looks about right.” But research shows that even small deviations from neutral posture can increase muscle strain by up to 30%. Over a 40-hour workweek, that adds up to real pain — and real productivity loss.
The fix isn’t expensive equipment. It’s knowing your numbers. In this guide, you’ll learn exactly how to measure your desk setup for perfect ergonomics — using nothing more than a tape measure, a few household items, and about 10 minutes of your time.
No guesswork. No gimmicks. Just a comfortable, pain-free workday.
Why Guessing Your Ergonomics Fails (The 90-90-90 Rule)
Before we dive into measurements, let’s establish the foundation: neutral posture.
Ergonomists often reference the 90-90-90 rule:
- 90° at your elbows — forearms parallel to the floor
- 90° at your hips — thighs parallel to the floor (or slightly declined)
- 90° at your knees — feet flat on the floor or a foot rest
When you violate any of these angles, your muscles compensate. Your shoulders hunch. Your lower back arches. Your wrists bend. Over time, this creates repetitive strain injuries, tension headaches, and chronic back pain.
A 2018 systematic review found that proper ergonomic adjustments reduced musculoskeletal discomfort by 61% among office workers. But here’s the catch: the adjustments had to be precise. Vague “adjust until comfortable” instructions didn’t work.
So let’s get precise.
How to Measure Your Desk Setup: 4 Key Measurements
Grab a tape measure, a ruler, and a friend (or a smartphone camera). We’re going to measure four things:
- Desk height
- Chair height
- Monitor height and distance
- Keyboard and mouse position
Write down each measurement. You’ll need them later.
1. Desk Height: The Foundation
Ideal range: 25–30 inches (standard desks are 29 inches)
Standing in front of your desk, relax your arms at your sides. Bend your elbows to 90 degrees. Your forearms should be parallel to the floor when resting on the desk surface.
If your desk is too high: Your shoulders will shrug up, causing neck and upper back tension. Solution: raise your chair and use a foot rest to keep your feet supported.
If your desk is too low: You’ll hunch forward, straining your lower back and shoulders. Solution: use desk risers or a standing desk converter.
Pro tip: For sit-stand desks, measure both seated and standing heights. Your elbows should still form 90 degrees at both positions.
2. Chair Height: The 90-90-90 Check
Ideal range: 16–21 inches (adjustable chairs only)
Sit all the way back in your chair. Place your feet flat on the floor (or a foot rest). Adjust your chair height until your knees are at a 90-degree angle — your thighs parallel to the floor or slightly declined (hips slightly higher than knees).
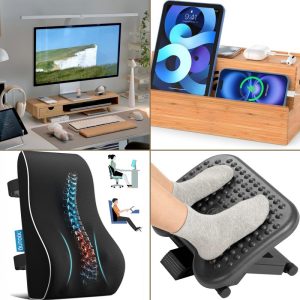
If your feet don’t reach the floor at 90 degrees, you need a foot rest. A Slowvana foot rest provides adjustable height and a gentle rocking motion that keeps your legs active and your circulation flowing — especially important for remote workers who sit for hours without a break.
Warning: Never let your feet dangle. This compresses the back of your thighs, restricts blood flow, and pulls your pelvis into a posterior tilt — a direct route to lower back pain.
3. Monitor Height: The One That Changes Everything
Ideal position: Top of the screen at or just below eye level, about an arm’s length away
This is the most common mistake I see. People position their monitor too low (laptop screens are the worst offenders) and look down all day. This forces your neck into flexion, adding up to 27 pounds of pressure on your cervical spine for every 15 degrees of forward head tilt, according to a 2014 study in Surgical Technology International.
How to measure:
- Sit in your adjusted chair with good posture.
- Close your eyes and relax your neck. Open them. Where does your gaze naturally fall?
- Your monitor’s top bezel (or the upper third of the screen) should be at that height — roughly eye level.
- Measure from the floor to that point. That’s your target monitor height.
If your monitor is too low: Use a monitor stand or riser. A Slowvana monitor stand lifts your screen to the correct height while adding storage underneath — no more neck craning.
If your monitor is too high: You’ll tilt your head back, straining the front of your neck. Lower it until your gaze is neutral (slight downward angle of 15–20 degrees is okay, but not more).
Distance: Your monitor should be about an arm’s length away (20–30 inches). If you’re squinting, increase font size rather than moving the screen closer.
4. Keyboard and Mouse: The Wrist Savers
Ideal position: Keyboard at or slightly below elbow height, wrists straight
Your keyboard should be positioned so that your elbows stay at 90 degrees and your wrists remain neutral — not bent up, down, or to the sides.
How to measure:
- With your chair and desk at correct heights, place your keyboard on the desk.
- Your forearms should be parallel to the floor. Your wrists should be straight (not extended upward).
- If your wrists are bent upward, your keyboard is too high. Lower it with a keyboard tray or adjust your chair.
- If your wrists are bent downward, your keyboard is too low. Raise it with a keyboard wrist rest.
A Slowvana wrist rest provides a cushioned, ergonomic surface that keeps your wrists in neutral alignment while typing. It’s especially helpful for those with existing wrist pain or carpal tunnel symptoms.
Mouse: Place it at the same height as your keyboard, as close to your body as possible. Use your whole arm to move the mouse, not just your wrist. Consider a vertical mouse if you experience forearm strain.
How to Measure Your Desk Setup for a Sit-Stand Desk
Sit-stand desks are fantastic — but only if you set them up correctly at both heights. Here’s how:
Standing height: Stand with your arms at your sides, elbows at 90 degrees. Your forearms should be parallel to the floor. Measure from the floor to your elbow. That’s your ideal standing desk height (plus or minus 1 inch).
Sitting height: Follow the seated measurements above. Your chair height and desk height need to work together.
The rule: Alternate between sitting and standing every 30–60 minutes. A 2017 study found that sit-stand desks reduced upper back and neck pain by 54% when used with proper posture and regular transitions.
But here’s the catch: standing all day isn’t the goal. Your body needs movement variety. Use a foot rest while standing (yes, it helps with weight shifting) and a lumbar support cushion while sitting to maintain the natural curve of your lower back.
The 5-Minute Daily Ergonomic Check
Once you’ve dialed in your measurements, don’t assume they stay perfect forever. Your body changes. Your chair sinks. Your monitor drifts. Do this quick check every morning:
- Feet flat? Yes or no. If no, adjust foot rest or chair height.
- Knees 90°? Yes or no. If no, adjust chair height.
- Hips 90° (or slightly open)? Yes or no. If no, adjust chair tilt or lumbar support.
- Elbows 90° at desk? Yes or no. If no, adjust chair height or desk height.
- Monitor at eye level? Yes or no. If no, adjust monitor stand.
- Wrists straight while typing? Yes or no. If no, adjust keyboard tray or wrist rest.
This takes 5 minutes. It will save you hours of pain.
Common Measurement Mistakes (And How to Fix Them)
| Mistake | Why It’s a Problem | Fix |
|---|---|---|
| Measuring while slouching | You’ll set everything too low | Sit tall, shoulders relaxed, ears over shoulders |
| Ignoring your chair’s tilt | Changes hip and knee angles | Set tilt to neutral (0–5 degrees backward) |
| Using a laptop without a stand | Forces neck flexion | Raise laptop to eye level with a stand; use external keyboard |
| Setting monitor too close | Eye strain and forward head posture | Move to arm’s length; increase font size |
| Forgetting your foot rest | Feet dangle, lower back pain | Use an adjustable foot rest |
What About Your Chair’s Lumbar Support?
Your chair’s built-in lumbar support might be in the wrong place. Most chairs have fixed lumbar support that doesn’t match your spine’s natural curve.
How to check: Sit in your chair and place your hand behind your lower back. The lumbar support should fill the curve of your lower back — not push into it, not leave a gap.
If it’s not right, an adjustable lumbar support cushion can make all the difference. It maintains the natural lordotic curve of your spine, reducing pressure on your discs by up to 40%, according to research on seated posture.
Your Perfect Desk Setup: A Quick Reference
Here’s your cheat sheet for how to measure your desk setup:
- Desk height: 25–30 inches (adjust with risers or converters if needed)
- Chair height: 16–21 inches (knees at 90°, feet flat)
- Monitor height: Top of screen at eye level, arm’s length away
- Keyboard height: Elbows at 90°, wrists straight
- Mouse height: Same as keyboard, close to body
- Foot support: Feet flat on floor or foot rest
- Lumbar support: Fills natural curve of lower back
Your Takeaway: Measure Once, Comfort Forever
You don’t need a $2,000 ergonomic chair or a motorized standing desk to work without pain. You need measurements that fit your body.
Take 10 minutes today to measure your desk setup. Adjust your chair height. Raise your monitor. Support your feet. Straighten your wrists. Your body will thank you — today, tomorrow, and for years to come.
If you need help getting the right gear, Slowvana offers ergonomic accessories designed for desk workers who want evidence-based comfort. Our monitor stands, wrist rests, foot rests, and lumbar support cushions are built to help you dial in your ergonomics — without the guesswork.
Your desk should work for you, not against you. Measure it. Fix it. Move on.
🪑 Fix Your Desk Setup in 5 Minutes
Download the free Ergonomic Setup Checklist — 15 steps to reduce pain and work comfortably.
Get Free Checklist →