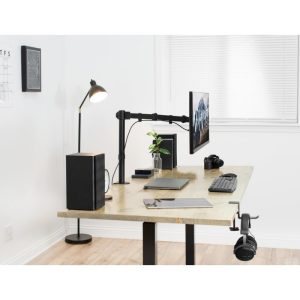
To choose the Right Monitor Stand Height for Neck Pain Relief, focus on proper ergonomics, consistent micro-breaks, and recovery habits tailored to your desk setup. Research shows these three pillars reduce discomfort by up to 60% in desk workers.
That Crick in Your Neck Isn’t Just a Coincidence You know the feeling.
That Crick in Your Neck Isn’t Just a Coincidence
You know the feeling. It starts as a dull ache at the base of your skull around 2 PM. By 4 PM, you’re tilting your head side to side, trying to crack something loose. Sound familiar? If you’re reading this, you’ve probably Googled “neck pain from desk work” more times than you’d like to admit.
Here’s the hard truth: Your monitor height is likely the culprit. A 2021 study published in the International Journal of Industrial Ergonomics found that improper monitor placement is a primary contributor to neck and shoulder discomfort among desk workers. When your screen is too low, you crane your neck forward. Too high, and you tilt your head back. Either way, your cervical spine pays the price.
But here’s the good news: Finding the right monitor stand height for neck pain relief isn’t complicated. With a few simple measurements and adjustments, you can transform your workspace into a neck-friendly zone. Let’s dive into the science and the setup.
Why Monitor Height Matters for Neck Pain
Your head weighs about 10 to 12 pounds when balanced over your spine. For every inch you crane it forward, the load on your neck muscles doubles. At 3 inches forward, you’re asking your neck to support 30 to 40 pounds. That’s like carrying a toddler on your head all day.
Dr. Erik Peper, a professor at San Francisco State University who studies ergonomics and posture, explains: “When we look down at a screen, we’re essentially reversing the natural curve of the cervical spine. Over time, this leads to muscle fatigue, disc compression, and chronic pain.”
The solution? Raising your monitor to eye level so you can maintain a neutral neck position. This is where a monitor stand becomes your best ally. Whether you’re using a laptop at a coffee shop or a dual-monitor setup in your home office, the principle is the same: Your screen should be positioned so you can look straight ahead, not down.
The Goldilocks Rule: How High Should Your Monitor Be?
Ergonomics experts agree on a simple formula: The top of your monitor screen should be at or slightly below eye level. This allows you to look slightly downward (about 15 to 20 degrees) without tilting your head. Why slightly downward? Because your eyes naturally prefer a slight downward gaze for reading, and it reduces dry eye by exposing less of the ocular surface.
Here’s how to find your ideal height:
- Sit comfortably in your chair with your feet flat on the floor and your back supported.
- Close your eyes and relax your neck. Then open them. Your natural line of sight is your starting point.
- Measure the distance from the floor to your eye level. Your monitor’s top edge should be roughly at that height.
- Adjust accordingly. If your monitor is too low, you need a stand or riser. If it’s too high (rare but possible), lower it.
For most people, this means the center of the screen sits about 15 to 20 inches above the desk surface. But desk heights vary, and so do chair heights. That’s why adjustable monitor stands are a game-changer.
What About Laptop Users?
If you work primarily on a laptop, you’re likely staring down at a screen that’s 6 to 8 inches below eye level. This is a recipe for “tech neck.” The fix? Use a laptop stand or a monitor stand to raise the screen to eye level. Then connect an external keyboard and mouse so your arms stay at a comfortable 90-degree angle. Your neck and wrists will thank you.
At Slowvana, we’ve designed our monitor stands with this exact problem in mind. They’re adjustable, sturdy, and elevate your screen to the perfect height without taking over your desk.
How to Measure Your Ideal Monitor Stand Height (Step by Step)
Let’s get practical. Grab a tape measure and follow along.
Step 1: Find Your Seated Eye Height
Sit in your chair as you normally would. Measure from the floor to the outer corner of your eye. Write that number down. This is your target for the top of your monitor.
Step 2: Measure Your Current Monitor Position
Measure from the floor to the top edge of your monitor screen. Subtract this from your eye height. The difference tells you how much you need to raise (or lower) your screen.
- If the difference is positive (eye height > monitor top), you need to raise your monitor.
- If the difference is negative, your monitor is too high.
Step 3: Choose the Right Stand Height
Now you know how much lift you need. Monitor stands come in various heights, typically from 4 to 8 inches. Choose one that matches your required lift. Adjustable stands are ideal because they let you fine-tune the height for different tasks or if you share your desk.
Step 4: Check Your Viewing Distance
Height isn’t the only factor. Your screen should also be about an arm’s length away (20 to 30 inches). If you’re too close, you’ll strain your eyes and lean forward. If you’re too far, you’ll squint. Adjust your desk layout accordingly.
Common Mistakes When Choosing a Monitor Stand
Even with the best intentions, it’s easy to get it wrong. Here are the top pitfalls to avoid:
Mistake #1: Using Books or Makeshift Risers
We’ve all been there. Stacking textbooks under your monitor feels like a hack, but it’s unstable and often too high or too low. A dedicated monitor stand provides a stable, ergonomically designed platform that won’t wobble or tip over.
Mistake #2: Ignoring Desk Depth
Some stands are deep and can push your monitor too close to your face. Always check the dimensions. A good stand should keep your screen at the right distance while elevating it to the right height.
Mistake #3: Forgetting About Cable Management
A cluttered desk is a stressful desk. Many modern monitor stands include cable routing channels or compartments to keep wires tidy. This isn’t just about aesthetics—it reduces visual clutter and helps you focus.
Mistake #4: Choosing Style Over Function
Yes, your workspace should look good. But a flimsy stand that wobbles or doesn’t provide enough lift will do more harm than good. Prioritize stability, adjustability, and height range over design alone.
The Science Behind the Perfect Angle
You might think that raising your monitor to eye level is enough. But research shows that the angle of your gaze matters too. A 2018 study in Applied Ergonomics found that a downward gaze of 15 to 20 degrees reduces neck muscle activity compared to a straight-ahead or upward gaze. This is why the top of your screen should be at eye level—it naturally encourages a slight downward angle.
If your monitor is too low, you’ll tilt your head down, increasing the load on your cervical spine. If it’s too high, you’ll tilt your head back, compressing the discs in your neck. The sweet spot is that gentle downward gaze.
Monitor Stand Options: What to Look For
Not all monitor stands are created equal. Here’s what to consider when shopping for one:
| Feature | Why It Matters |
|---|---|
| Height adjustability | Lets you fine-tune for your exact eye level. Ideal for shared desks or different tasks. |
| Weight capacity | Make sure it can support your monitor size (most stands hold 10-20 lbs). |
| Stability | A wobbly stand defeats the purpose. Look for a wide base or non-slip feet. |
| Desk space | Some stands have storage underneath for keyboards or notebooks. Great for small desks. |
| Cable management | Keeps wires out of sight and out of mind. |
| Material | Wood, metal, or acrylic? Choose based on your style and durability needs. |
At Slowvana, we’ve crafted our monitor stands with these features in mind. They’re adjustable, stable, and designed to complement your desk aesthetic while prioritizing your health.
Beyond the Stand: Other Ergonomic Adjustments for Neck Pain
Raising your monitor is a huge step, but it’s not the only one. For comprehensive neck pain relief, consider these additional tweaks:
1. Check Your Chair Height
Your feet should rest flat on the floor, with your knees at a 90-degree angle. If your chair is too low, you’ll look up at your monitor even if it’s raised. Adjust your chair first, then your monitor.
2. Use a Lumbar Support
When your lower back is unsupported, you tend to slump, which pulls your head forward. A lumbar support cushion helps maintain the natural curve of your spine, keeping your head aligned. Slowvana’s lumbar support is designed to fit most office chairs and provide targeted lower back relief.
3. Add a Wrist Rest
Neck pain often travels down from the shoulders. If your wrists are bent while typing, your shoulders tense up, which radiates to your neck. A wrist rest keeps your wrists straight and your shoulders relaxed. Explore Slowvana’s ergonomic wrist rests for a comfortable typing experience.
4. Consider a Foot Rest
If your desk is too high and your chair can’t adjust lower, a foot rest keeps your feet supported and your pelvis stable. This prevents you from sliding forward and craning your neck. Slowvana’s foot rests are height-adjustable and promote healthy circulation.
5. Take Microbreaks
No amount of ergonomic gear can replace movement. Every 30 minutes, stand up, stretch your neck side to side, and look at something 20 feet away for 20 seconds. This resets your posture and reduces muscle fatigue.
Real People, Real Relief: What Users Say
We’ve heard from countless desk workers who transformed their neck pain by adjusting their monitor height. Sarah, a graphic designer from Austin, shared: “I used to get migraines every week. After raising my monitor with a Slowvana stand, my neck pain dropped by 80%. I can’t believe I waited so long.”
Another user, Mark, a remote software engineer, noted: “I thought my neck pain was just part of aging. Turns out I just needed to look straight ahead instead of down. The difference is night and day.”
Your Action Plan for Neck Pain Relief
Let’s summarize everything into a simple checklist you can implement today:
- Measure your seated eye height and compare it to your monitor’s top edge.
- Raise or lower your monitor to align with your eye level. Use a monitor stand if needed.
- Adjust your viewing distance to about an arm’s length away.
- Check your chair and desk height for overall alignment.
- Add ergonomic accessories like a lumbar support, wrist rest, or foot rest for full-body comfort.
- Take regular breaks to move and reset your posture.
By following these steps, you’re not just fixing your monitor height—you’re investing in a pain-free, productive work life.
Frequently Asked Questions
Can a monitor stand really help with neck pain?
Absolutely. When your monitor is too low, you crane your neck forward, which strains the muscles and discs in your cervical spine. Raising it to eye level reduces this strain significantly. A study from the Journal of Physical Therapy Science found that proper monitor height reduced neck pain by 40% in office workers.
What if I use a laptop without an external monitor?
Use a laptop stand or monitor stand to raise the screen to eye level. Then connect an external keyboard and mouse. This is the ergonomic gold standard for laptop users.
How do I know if my stand is the right height?
After adjusting, sit in your natural working position. You should be able to see the top of the screen without tilting your head. Your eyes should look slightly downward (15-20 degrees) to read the center of the screen.
Is an adjustable stand worth the extra cost?
Yes, especially if you share your desk or switch between sitting and standing. Adjustable stands let you dial in the perfect height for any scenario.
Ready to Say Goodbye to Neck Pain?
Your desk setup shouldn’t be a source of chronic pain. With the right monitor stand height for neck pain relief, you can work comfortably and focus on what matters. Start with the measurements above, and if you’re ready to upgrade your workspace, explore Slowvana’s range of ergonomic solutions—from monitor stands to lumbar supports—all designed with your recovery in mind.
Your neck has carried enough weight. It’s time to lift the screen, not the burden.
🪑 Fix Your Desk Setup in 5 Minutes
Download the free Ergonomic Setup Checklist — 15 steps to reduce pain and work comfortably.
Get Free Checklist →